ypography design is everywhere. Do you ever notice the line spacing on the list of ingredients on the back of a crackers package? Or the shape of the numbers on a price tag or even the weights of the letters (a.k.a how thick or thin they are) on street name signs? These may not be your go-to inspirational sources, but they’re an everyday part of life.
In fact, we’re constantly surrounded by letters, everywhere we look. All these sources offer us different perspectives and insights, and show us the endless ways typography can be used.
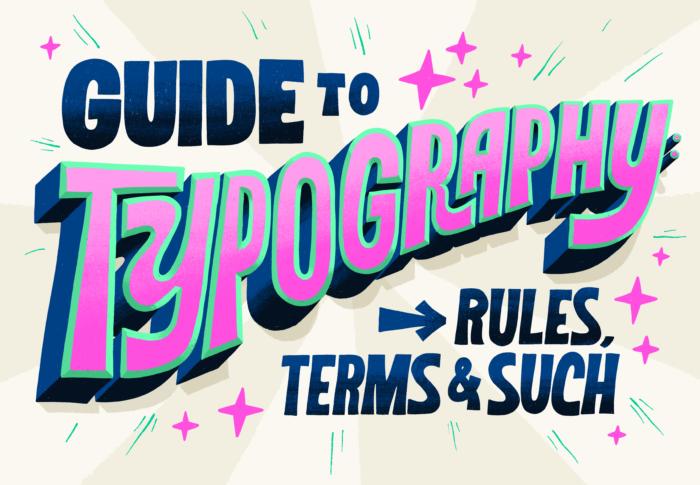
Before we dive deeper into typography design, let’s take a look at what typography is, and where it came from.
A brief history of typography
—
What is typography design? In short, typography design is the art of arranging a message in a readable and aesthetically pleasing composition. It’s an integral element of design. Typography doesn’t ask the designer to draw their own letterforms, but to instead work with typefaces that already exist. This process requires the designer to go through a series of decisions like selecting the proper typeface, choosing the point size, adjusting kerning and line spacing and coming up with a layout that makes sense.
This can be done quickly and easily using laptops, computers and even phones. Thanks to technology, typography and its rules are being challenged each day by new generations of designers who are envisioning letters in ways we couldn’t have imagined just a few years ago.
type example
Who says fact sheets have to be boring? Via andwalsh.
type example
Keeping it simple with big and bold typography is always a good choice. Via Pentagram.
But it wasn’t always about technology. Movable type was invented in the early 15th century thanks to Johannes Gutenberg, and revolutionized typography by allowing the mass production of printed materials. Yet even before printing techniques existed, people were still determined to create books or type-based posters. They just did it by hand, with a lot of patience and dedication. Human beings have alway created written messages—a lack of paper and proper writing tools never stopped us. Ancient civilizations carved their glyphs into stone or wood.
If we look at the evolution of typography and all the tools and techniques used so far, we will notice an ongoing battle between the hand crafted and the machine made, between the organic and the geometric. Today, radically separating the two worlds, as well as harmoniously merging them, gives birth to new and unusual results, fueling a never ending cycle of typographic exploration.
Typography design terms you need to know
—
There are some basic rules and design terms you need to know before you dive into typography. Here are the most important ones:
Style
Letters come in many many different shapes and styles. Categorizing them can be challenging as there are many factors to take into consideration: their looks, the inspiration for them, the era they appeared in and their usage. For the sake of simplicity, we often refer to three major style categories and then split those into smaller ones.
Serif
The first serif typefaces were inspired by traditional calligraphy, and are called Humanist or Old Style. This style is characterized by smooth and rounded forms and slight weight variations.
humanist typeface
Around the mid 18th century a new type of serif emerged, which we now call Transitional. This style marks the transition between the Humanist and Modern styles, so it combines a little of both styles’ characteristics.
Transitional typeface
By the late 18th and early 19th centuries, a mode radical serif style was born: the Modern. We can recognise this style by the sharp weight contrast and the thin, straight serifs.
Modern typeface
With the rise of advertising in the 19th century, Egyptian or Slab Serifs were introduced. Thanks to their bold appearance and heavy serifs, they were the preferred style for displaying commercial messages.
Slab typeface
Sans Serif
Sans serif typefaces became popular in the 20th century, and they also had a calligraphic influence, so we call them Humanist as well. We can observe a slight weight variation and an overall warm vibe.
Humanist typeface
In the mid 1900s Helvetica was created, setting the bar for Transitional sans serifs. These letters are uniform and more rigid than the previously used ones, lacking the hand crafted element.
Transitional typeface
Geometric sans serifs are the equivalent of Modern serifs. They are built on geometric forms (the letter O is a perfect circle) and the peaks of letters like A or N are sharp and strong.
Geometric typeface
Cursive
Script letters imitate handwritten and calligraphic styles and they can be anywhere from sleek and formal to messy and effortless.
Script typeface
Brush faces are close to Scripts, but they draw inspiration from brush lettering. This makes them bolder and less elegant.
Brush typeface
Finally, the Gothic or Blackletter style has traditional felt tip calligraphy at their base. The style is developed from Carolingian minuscule, and by the mid-12th century a new style was created with sharp, straight and angular lines.
Gothic or blackletter typeface
Font vs. typeface
I’m certain we’ve all been confused at some point in life about the difference between a font and a typeface. I definitely was!
A typeface (or a font family) is the visual design of the letterforms and it consists of multiple font formats. In metal typesetting, a set of physical letters is considered a font, containing every existing letter, numeral and punctuation mark as a separate element. In the digital world, the font is the software we install and use.
A full font family can have an overwhelming amount of styles: from super thin to ultra black and from extra condensed to super wide, all in regular and italic.
Font types
But wait, that’s not all. Some faces also have small caps (uppercase letters that only extend to the x-height), lining numerals and non-lining numerals (numbers that extend beyond the baseline and x-height, integrating more seamlessly into blocks of text) and in some cases even a few extra alternate characters. That’s quite a lot, huh?
Font types
Anatomy
The anatomy of letters is quite complex—every little detail and element has its own term.
Here are a few of them:
Type anatomy
And here are a few punctuation marks, along with their names and proper usage:
Recognizing typographic illusions
—
Letters are awesome not only because they express so many emotions, but also because they possess the ability to trick our eyes.
Let’s look at a few optical illusions found in typography design:
Illusion 1
The S seems like a perfectly symmetrical letter, right? Well, it’s not. Just rotate it 180° and you’ll see that the top is actually smaller than the bottom. This makes it look more stable and confident.
Font illusion
Illusion 2
Even though all letters seem to be the exact same height, the round shapes are actually slightly bigger. The intersection of the O, for example, with the baseline and cap height is just a single point. While the intersection of the letter E, for example, touches those lines with its full surface. Because both letters are technically the same size, they will seem disproportional. We need to overshoot the O a little in order to make them visually equal.
Font illusion
Illusion 3
To make the letter O seem symmetrical and consistent in weight, we actually need to make it—not consistent in weight. Flip the letter O 90° and you’ll realize that the sides are a bit thicker than the top and bottom.
Font illusion
Illusion 4
Since we’re flipping letters, let’s try the same trick on the letter A. Flipping it horizontally will reveal that this seemingly symmetrical letter is actually not symmetrical. Little cheats need to be applied to certain letters, even if that means going against the mathematical rule, in order to have them visually pleasing.
Font illusion
Illusion 5
If you know anything about calligraphy, you know that the upstrokes are thin, the downstrokes are thick and the cross strokes are thin again. This rule needs to be applied to even the most simple and geometric letters, like the letter T for example.
Font illusion
Illusion 6
The crossbars in the letters E and A theoretically are found at the middle of the letter, one might think. Well, think again. In order for the letter to look well balanced, they need to be moved just a bit. You can clearly see that the crossbar is off centered by turning the letter upside down.
Font illusion
Illusion 7
The letters B, P and R are sister shapes, one being derived from the other. However, that doesn’t mean they have the same proportions. The bowl of the R needs to be slightly thinner so that when we connect the leg to it, it won’t become super thick. While the upper bowl of the B needs to be smaller than the bottom one, so that the letter appears more stable.
Font illusion
Font illusion
The rules of typography design
—
Yes, I know, rules are meant to be broken, but in order to break the rules in a way that won’t make a designer cry you need to learn them first.
When working with type and arranging paragraphs on a page we need to pay attention to a few factors and make sure the thing we’re designing will be legible and clear. Except of course, if you’re creating some abstract, experimental typographic poster, aiming for total chaos and anarchy. If that’s your jam, go for it. But if you’re working with long bodies of text, meant not only to catch the viewer’s eye but to actually portray a message in a straightforward way, you need to be mindful of every decision you make.
Alignment
Alignment refers to arranging a body of text on a page, more specifically, aligning its edges to those of the page. There are 4 types of alignment, but bare in mind that none is less correct than the other, they simply have different looks and express different vibes.
Flush left
This is probably the most commonly used alignment, as it follows the natural flow of most languages. When using this alignment one must pay attention to creating a well balanced right edge, with row lengths that have a natural feel.
Make sure to avoid lone words on new rows. These are called “widows” and they are sad.
Font flush left
Flush right
Opposed to the flush left alignment, the flush right goes against the natural flow of most written languages, which can also be used to our advantage. Be mindful though, that this alignment creates an unusual look and it can be hard on the eyes when used in long paragraphs. In order to have a clean right edge, try to avoid lots of full stops or commas at the end of the rows.
Font flush right
Centered
If done poorly, a centered alignment can look rather boring and messy. With a lot of attention though, it can create an elegant yet dynamic feel. The key is to play with the lengths of the rows, while maintaining an overall balance.
Font centered
Justified
Although it can look modern and clean when done well, justified alignment can go really wrong very fast. Because the words have to fill the whole row, awkward spaces can occur between them. Be sure to even everything out nicely and again, if necessary, play with the size of the text, the lengths of the text box and the kerning.
Font justified
Tracking
The process of adjusting the overall space between letters is called tracking or letter spacing. In most cases one will apply positive tracking rather than negative, in order to create a more open and airy composition.
The bigger the text gets, the bigger the space between the letters gets and so the tracking needs to decrease. Similarly, if the text size gets smaller, we need to increase the tracking.
Font tracking
Increasing the tracking can get tricky, as we often have the tendency to apply more than actually needed. A tip to remember is that uppercase letters allow a more generous tracking than lowercase.
Font tracking
Kerning
Kerning refers to modifying the space between individual letters. Even though in most cases we can get away with applying tracking, we sometimes need to get in there and tweak the space solely between two letters. These “kernable” gaps will most commonly appear around letterforms like A, W, V, T.
Oh look, here’s a little game to test your kerning skills!
If we work with well-constructed typefaces, we won’t need to apply massive amounts of kerning. If we do though, we have the possibility to apply optical kerning (which is automatically executed by the program we’re working in) or metric kerning (which will use the kerning the type designer intended when designing the typeface) in our editing app, or we can do it all manually (using our intuition and experience).
Font kerning
Analyze your letters and apply the tracking method that best suits the purpose. Also, keep in mind that just because optical kerning will work fine for a certain typeface, doesn’t mean it will be the best choice in all situations.
Leading
The distance between two lines of text is called leading or line spacing. By adjusting it, we can play with the texture and color of the paragraph, creating visual interest and building hierarchy. The optimal size of the line spacing depends on various things, such as the volume of words in relation to the usable space, the display size or simply the vibe we are going for.
Font leading examples
Hierarchy
Hierarchy helps us in creating visual interest and in guiding the viewer’s eyes across the page, making the process of absorbing text a lot easier and intuitive. The most obvious and easy way we can create some hierarchy is have our information written in different sizes.
We can also create an interesting hierarchy by tweaking a letter or the line spacing or by adjusting the size of our text. We can also mix up the styles used or the colors or use special characters or different alignments and layouts.
The way we decide to arrange our text—specifically what parts to bring to the front—is highly dependent on what type of material we are preparing the text for: print or digital. If it’s for print, is it a newspaper spread with lots of text, a magazine cover with a main title and some shorter ones presenting the content of the magazine or a poster with title and some info, such as dates and locations? If it’s for the web, what is our goal with the page: what is the length of the text we need to display and who are we designing it for?
type example
We can’t talk about typography without mentioning the identity system Paula Scher created for the Public Theater.
However, using hierarchy is not always about highlighting certain parts of the text. We can also use hierarchy to create visually interesting compositions, like patterns and shapes, by changing the weights, the colors and sizes.
Keeping all these references in mind will help us in constructing a proper hierarchy, without overwhelming the reader.
hierarchy example
The perfect example of a clean and straightforward hierarchy: title, body text, and image caption. Via erdem özsaray.
hierarchy example
We can use hierarchy not only to categorize certain information, but to create engaging imagery as well. Via Macmillan.
hierarchy example
Notice the gradient-like effect thanks to the gradual change in the weights. Via Typografische Monatsblätter.
Grids
One of the most important elements in the process of working with bodies of text is the grid, and it can be anywhere from simple to complex. By using grids, we are basically framing the information on a given page. This gives us better control over how we arrange the elements on our page. With the correct usage of grids, we can create compositions that guide the viewer’s eye, making the information easy to process and understand.
As with everything, we can work with simple and plain grids, or we can go totally wild and come up with intricate and complex ones.
grid example
Even though the overall grid for this layout is rather simple and static, the big box in the center along with the two smaller ones on the sides gives it some movement, making it visually engaging. Via Süddeutsche Zeitung, illustration via Dirk Schmidt.
Another very important thing to keep in mind when arranging information on a page is white space. Befriend it and keep it close to you at all times.
Many have the urge to fill every corner of the page with text or images but having generous amounts of white space is usually a good idea. It gives the information breathing space, it makes the composition more airy and it helps the reader move through the information.
grid example
Beautiful examples of type and white space working together to create a clean and airy composition. Via Arbeitsform: Rochade.
grid example
There’s nothing wrong in going absolutely crazy with with your layout, as long as you text remains legible. Via futuraproject.cz.
The power of typography
—
Typography design has massive power to influence a message. When used in the right way—a proper combination of style, size, hierarchy, kerning and line spacing—there’s nothing you cannot express with it. From formal and elegant pages to dynamic and mind-bending compositions, you can do whatever your imagination can come up with.
By understanding the rules and facts about letters and the various ways they can be used, we are able to express ourselves through them in endless ways. These rules are nothing but a guide. I highly encourage you to go ahead and break all of them! Learn, experiment, forget what you learned, make mistakes and start over. By doing so you will develop a style that is unique to you.
Want to learn more about typography? Check out the newest font trends, the best font pairings and the top logo fonts.

Leave a Comment